Setup guide
Make Morrow
yours.
About 2 hours in total
Step 1
Logo, colors and fonts
About 20 minutes
Every color and text on the site comes from a small set of styles. Change a style once and every page follows.
Assets
›
Styles
›
Color
1
Open Assets at the top of the left panel, then Styles › Color.
2
Click Brand and pick your church color. Buttons, links and highlights update everywhere.
3
Do the same for Ink (text and dark areas) and Sky (soft highlights).
4
For fonts, open Styles › Text. Each text style (Display, Heading 2, Body and so on) changes everywhere at once.
5
Replace the logo in the Header component and in the footer (Assets › Templates › Main Layout).
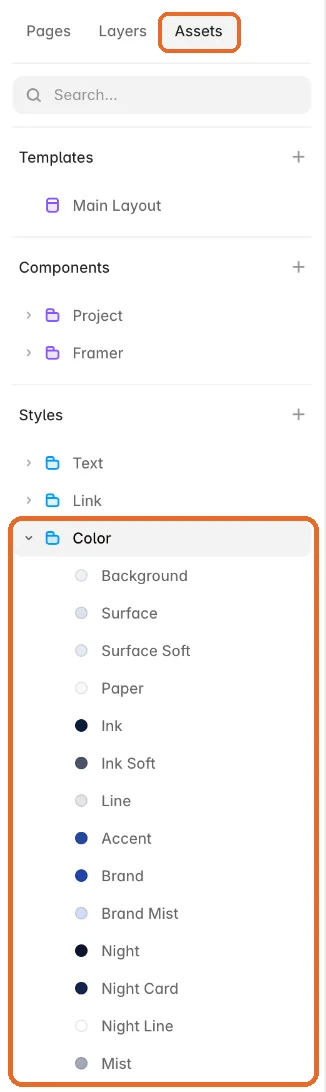
The marked list holds every color on the site.
Brand
#2045A8 · Buttons, links, highlights
Ink
#0B1A3A · Text, dark areas
Sky
#CADCF6 · Soft highlights
Also in the set:
Background
Surface
Paper
Night
Mist
Aa
Hanken Grotesk
Headings and text
Aa
EB Garamond
Italic accent words
Tip: the Styleguide page shows every color, text style, button and card in one place. It is hidden from search engines.
Step 2
Your church details
About 20 minutes
Replace the demo church in these five places.
Address, service times, email, phone and social links. Find it in Assets › Templates › Main Layout.
Phone, email, address and the location of the Google Map.
These are examples. Replace them with your own legal text.
Site title, description, language, favicon and social image. Open Settings from the menu at the top left.
Block MORROW-SEO: church name, website, address, phone, email and social profiles. Search engines read these values.
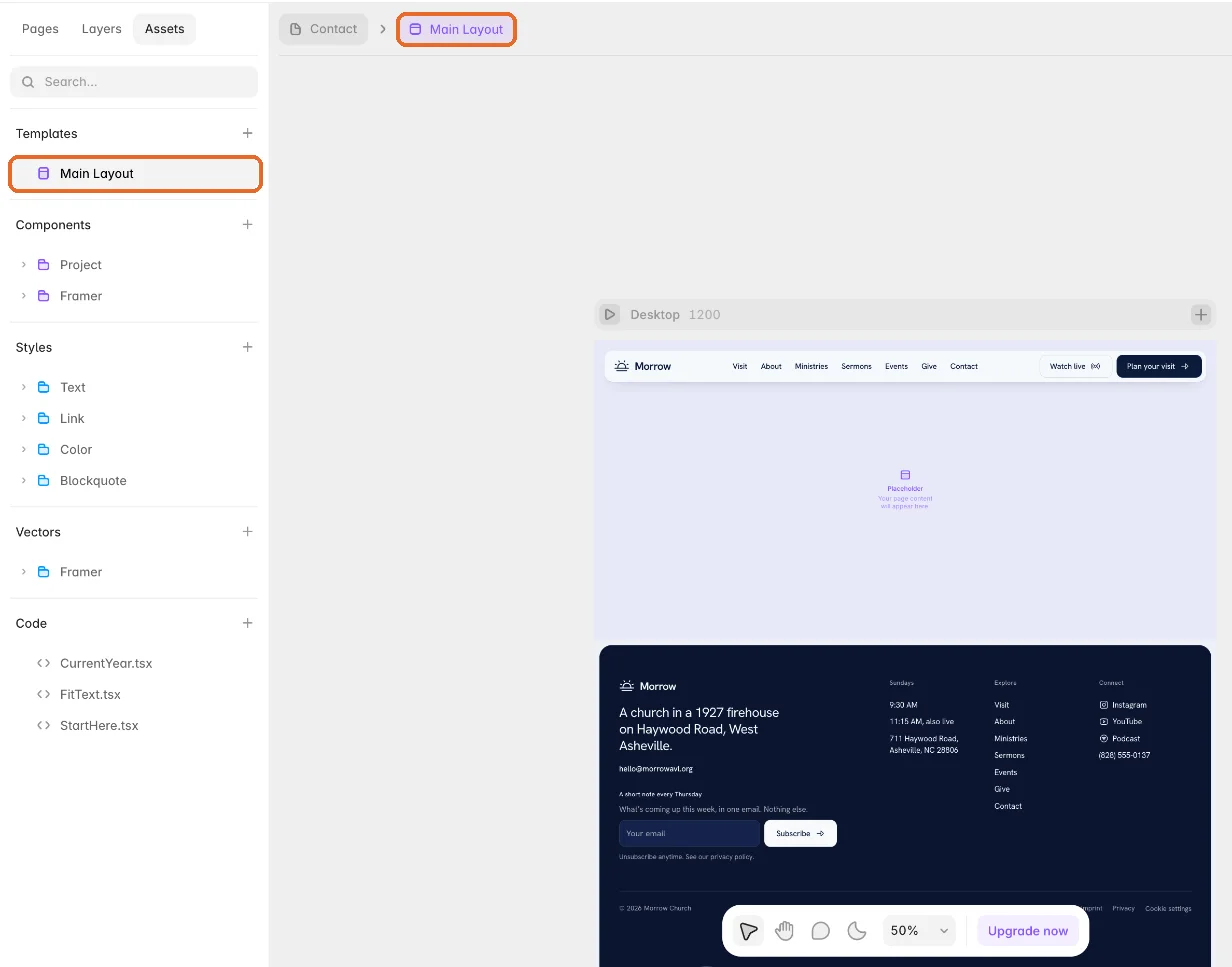
Assets › Templates › Main Layout. Header and footer live here, so every page follows.
Step 3
Sermons and events
About 45 minutes
Sermons and events live in the CMS, Framer’s built-in content manager. Add an entry once and it appears on every page that shows it.
Menu top left
›
CMS
›
Sermons or Events
1
Switch from Canvas to CMS in the menu at the top left.
2
Pick Sermons or Events on the left.
3
Click + to add an entry, fill in the fields and leave the status on Live.
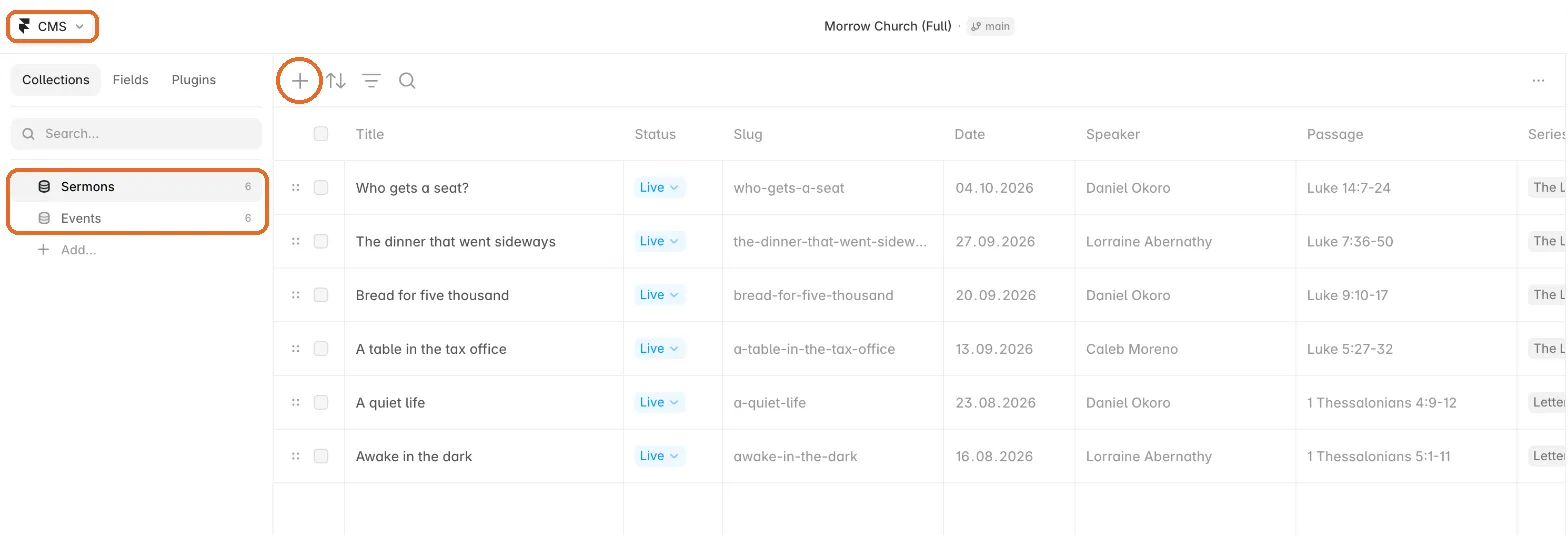
The CMS view. Choose a collection on the left, add entries with +.
Sermons
The newest sermon shows on the home page and at the top of the Sermons page. The series filter uses the Series field.
Title
Date
Speaker
Passage
Series
Length
Image
Summary
Notes
Video Link
Events
Events appear on the home page and the Events page, sorted by date. Each event gets its own page with a sign-up form.
Title
Date
Time
Location
Address
Category
Cost
Image
Details
Sign Up Link
Tip: event posters work best at 4:3 with the text inside the center square, so they also crop well on cards. Past events hide themselves the day after their date.
Step 4
Forms
About 10 minutes
Morrow has four forms. Tell each one where to send submissions.
Contact
Plan Your Visit
Event sign-up
Newsletter in the footer
1
Click a form on the canvas, for example the card on the Contact page.
2
In the right panel under Form, open Send to and enter your email address, or pick an integration.
3
Change the confirmation text in the Success Text of the form’s Submit Button.
4
Publish and send yourself a test message.
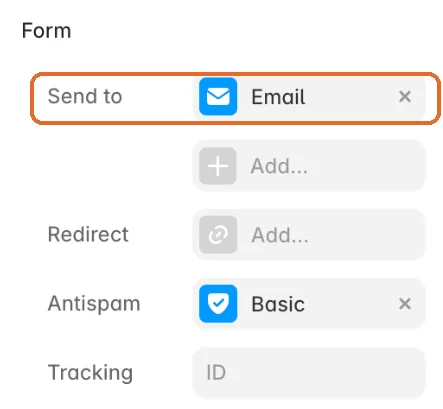
Form settings in the right panel.
Keep these names: the Submit Button variants Success and Light Success. The style block MORROW-FORM-SUCCESS uses them to hide the fields after sending.
Step 5
Domain and publish
About 15 minutes
1
Click Publish at the top right. Your site goes live on a free framer.website address.
2
For your own domain, open Settings › Domains and follow the steps. Framer shows the DNS records to enter at your domain provider.
3
Open the site on your phone and click through every page once.

Publish, then Update whenever you change something.
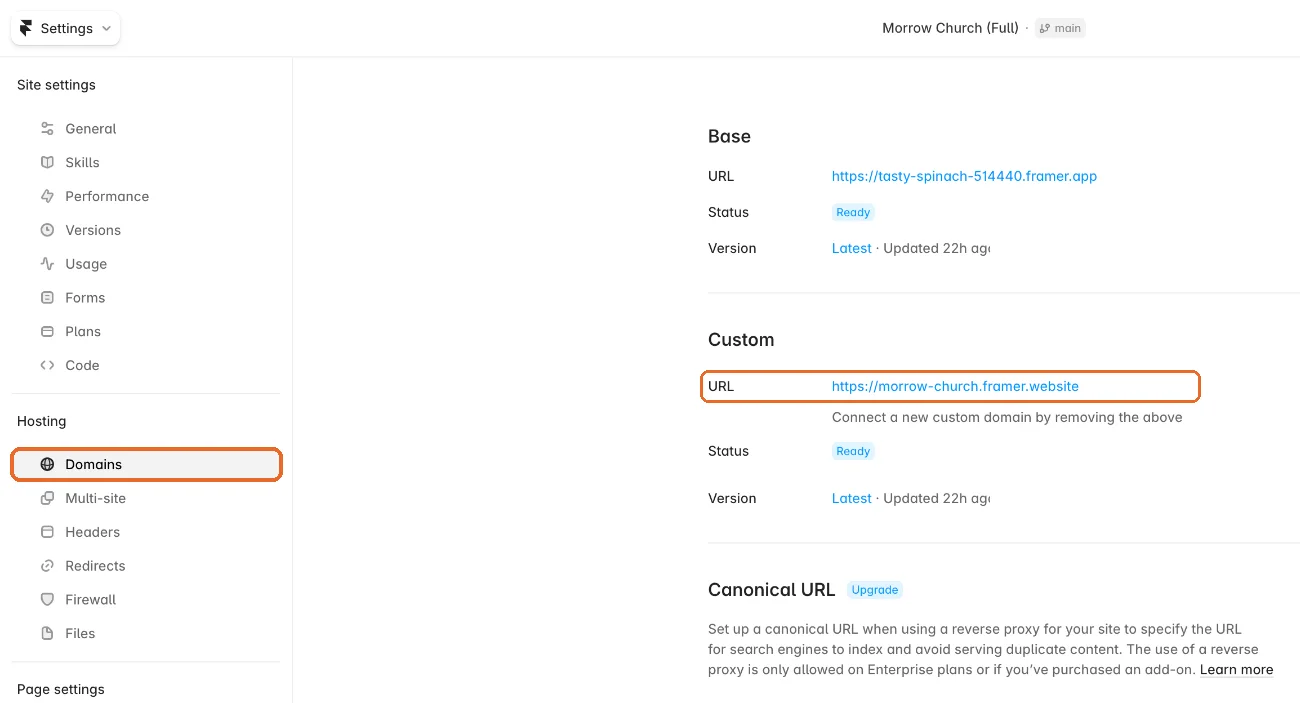
Settings › Domains. Connect your own domain here.
Tip: a custom domain needs a paid Framer site plan. DNS changes can take a few hours to arrive.
Reference
Weekly schedule and breaks
Regular gatherings are text on the Events and Visit pages. For a break, select the Schedule Notice on the page, edit Title and Text and switch Show to Yes. Switch it back when you return.

Watch live, YouTube, podcasts
The Watch live button and the YouTube, Spotify and Apple Podcasts buttons link to the platform home pages. Replace them with your channel and show links. Each sermon has its own video link in the CMS.
Footer motto
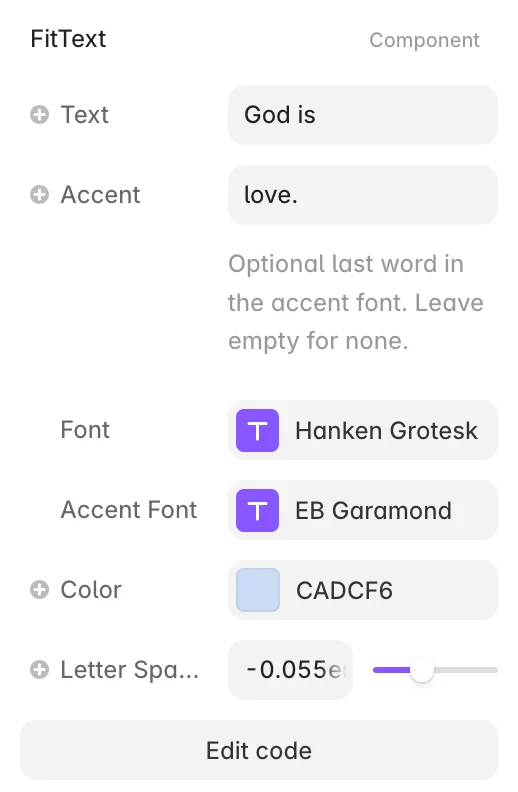
The large “God is love.” is the Motto layer in the footer. Change Text, Accent (the last word in the second font), fonts and color in its properties. It always fills the full width.
Cookie banner
Select Cookie Banner in the footer (Main Layout) to change texts, colors and the privacy link. Switch Preview to Yes to see the banner while you edit. Map and YouTube links are not blocked by the banner; check what your region requires.

Custom code
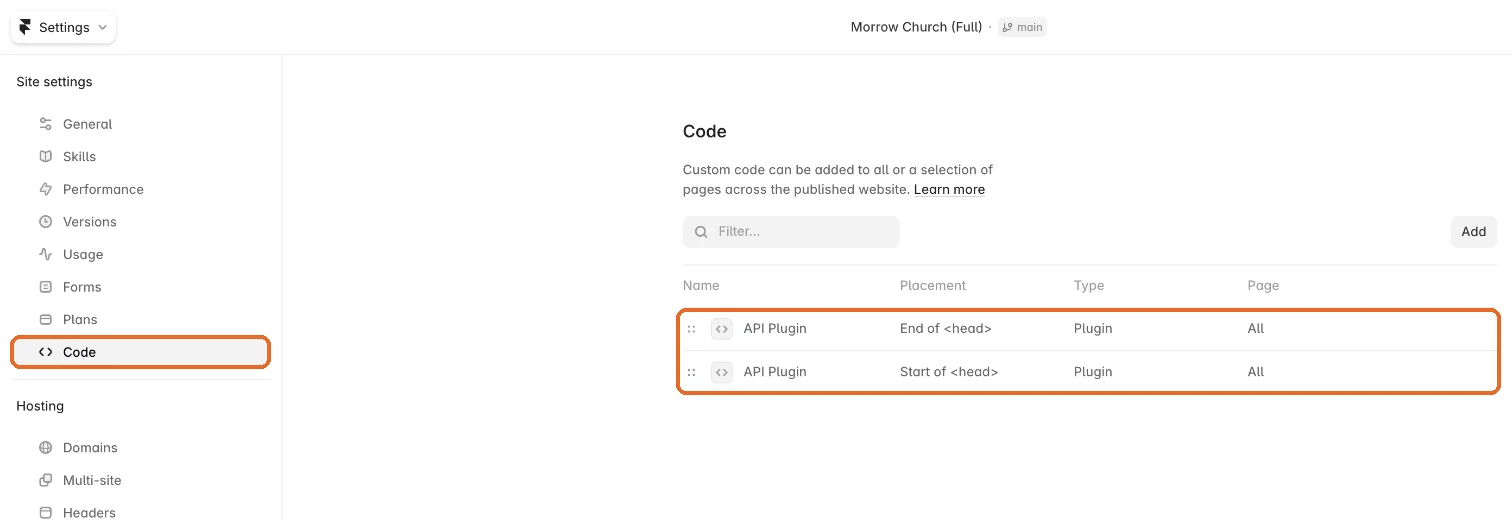
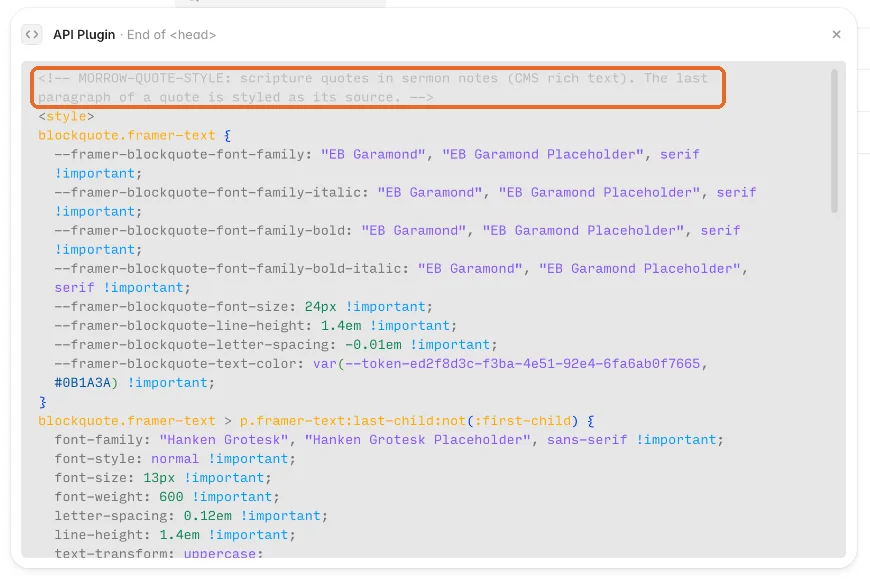
Settings › Code lists two entries called API Plugin, one at the start and one at the end of <head>. Click one to open it: each block inside starts with a comment that names it. Keep them unless you know you do not need them.
Sets the site language to English. Change “en” for another language.
Structured data for your church, see step 2.
Builds FAQ data for search. Name new FAQ items “Q&A / your question”.
Style for scripture quotes in sermon notes.
Hides form fields after sending, see step 4.
Get help
Want it set up for you?
Sitewright, the studio behind Morrow, sets up the template for your church at a fixed price: your logo, colors, text and photos in place, your domain connected and the site published within five business days.